How to Draw a Ski Jumper Step by Step
Coloring guide
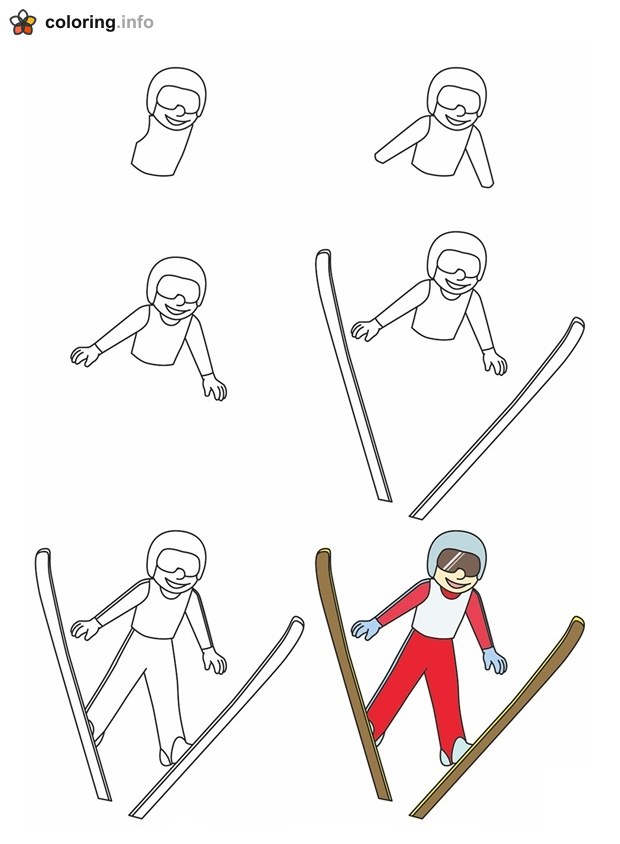
A ski jumper leans forward in mid-flight, shown in six small steps that build the drawing from the top down. The first box starts with a round helmet, goggles, a smiling mouth and the top of the body. Next come the arms, then the hands held out to each side. After that the two long skis are added, tilted in a V shape. The fifth step draws the legs and boots, and the last box shows the finished figure colored in with a light blue helmet, brown goggles, a red suit with a white chest panel, blue gloves and brown skis with yellow tips. Kids can copy each step in order with a pencil, then color their own jumper using the final box as a guide. Try giving the suit a new color pattern, or print the page for a quick winter sports art lesson.
More How to Draw Coloring Pages

Easy Step by Step Cat Drawing Guide

How to Draw a Face Step by Step

How to Draw an Astronaut Step by Step

Step-by-Step Chameleon Drawing Guide for Kids

How to Draw a Friendly Cartoon Ghost Step by Step

How to Draw a Cartoon Mummy Step by Step

How to Draw a Waving Skeleton Step by Step

How to Draw a Flowering Tree Step by Step