Step by Step Cartoon Bunny Drawing Tutorial
Coloring guide
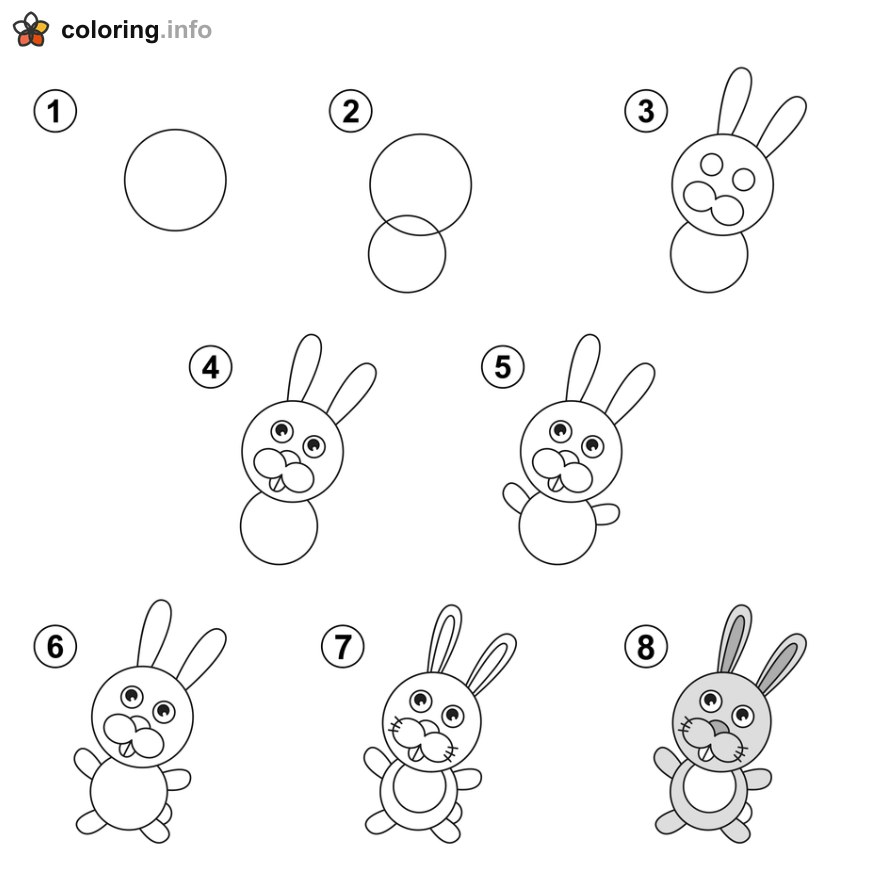
Eight numbered panels show how a cartoon bunny is built from simple shapes. Step 1 starts with a single circle, and step 2 adds a smaller circle below it for the body. In step 3 the bunny gets two tall ears, two round eyes and puffy cheeks around the nose. Step 4 adds pupils with little highlights and a small tooth. Step 5 draws the arms, step 6 adds the feet, and step 7 gives the ears an inner outline, adds whiskers and draws a round belly patch. The last panel shows the finished bunny shaded in gray with darker inner ears and a pink-toned nose. Kids can follow along one panel at a time, then color the final bunny on their own page. Try gray for the fur, a softer shade for the belly and inner ears, and pink for the nose. It also works well as a free printable shape-drawing lesson for beginners.
More How to Draw Coloring Pages

Easy Step by Step Cat Drawing Guide

How to Draw a Face Step by Step

How to Draw an Astronaut Step by Step

Step-by-Step Chameleon Drawing Guide for Kids

How to Draw a Friendly Cartoon Ghost Step by Step

How to Draw a Cartoon Mummy Step by Step

How to Draw a Waving Skeleton Step by Step

How to Draw a Flowering Tree Step by Step