Step by Step Cute Bat Drawing Guide
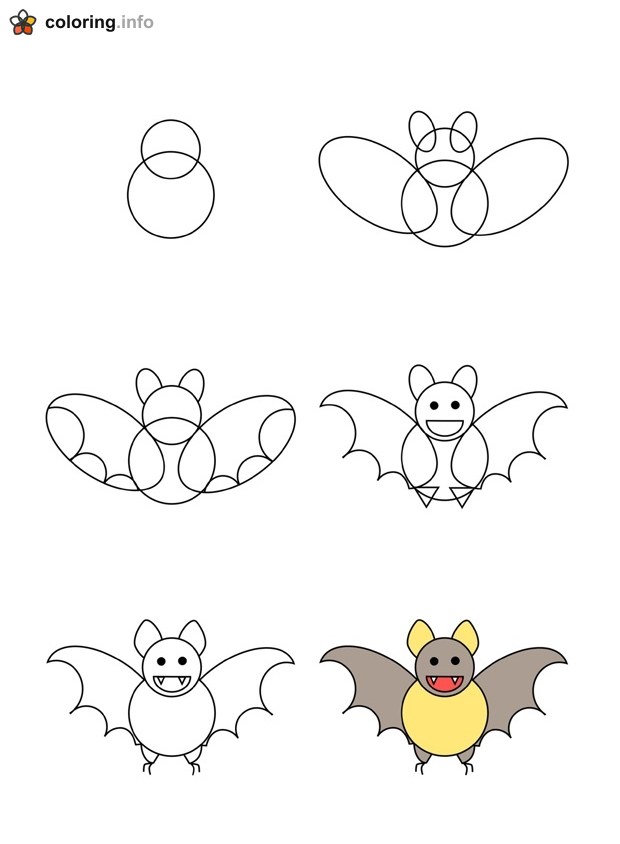
Coloring guide
Six small drawings are arranged in two columns and three rows, showing how to build a smiling bat from simple shapes. The first step is two overlapping circles for the head and body. Next come two oval ears and two large oval wings on either side. Then scalloped curves are added along the bottom edges of the wings. Step four turns the wings into pointed, bumpy shapes and adds a happy open mouth with two dot eyes. The fifth step adds little fangs and tiny feet under the round belly. The last picture shows the finished bat colored in, with gray-brown wings and head and a yellow belly and inner ears. Kids can trace each step with a pencil first, then color their own bat. Try a different color combination for the wings and belly to make it yours.
More How to Draw Coloring Pages

Easy Step by Step Cat Drawing Guide

How to Draw a Face Step by Step

How to Draw an Astronaut Step by Step

Step-by-Step Chameleon Drawing Guide for Kids

How to Draw a Friendly Cartoon Ghost Step by Step

How to Draw a Cartoon Mummy Step by Step

How to Draw a Waving Skeleton Step by Step

How to Draw a Flowering Tree Step by Step